Sharpening a pole saw blade is a crucial maintenance task to ensure efficient and safe cutting. Begin by wearing appropriate safety gear, including goggles, gloves, and hearing protection. Secure the blade in a vise or with clamps, ensuring it’s disconnected from any power source.
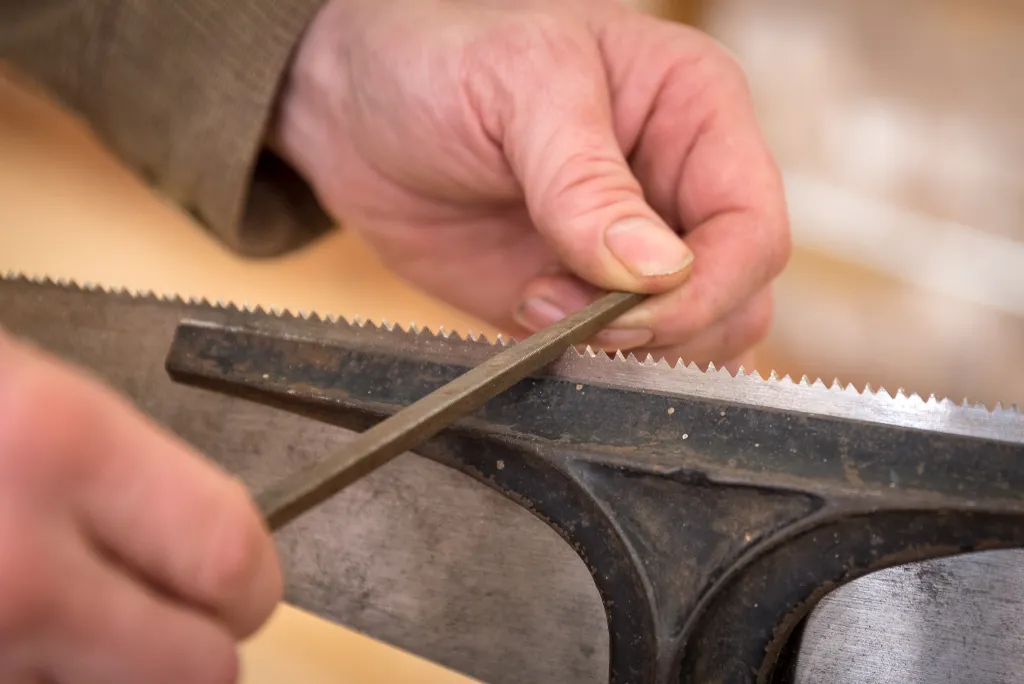
Identify the cutting teeth on the blade and determine the correct angle for sharpening, typically between 30-45 degrees. Use a flat file to sharpen each tooth individually, maintaining even pressure and a consistent, smooth motion. Consider marking the teeth you’ve already sharpened to track your progress. Occasionally, adjust the rakers or depth gauges for proper cutting depth.
What Are the Step-by-Step Guide For This Process?
By following these steps, you can easily sharpen a pole saw blade.
Safety First
Disconnect the Power Source: Before you start sharpening your pole saw blade, it is absolutely crucial to ensure that it’s disconnected from any power source. This means turning off the motor and removing the battery or unplugging it from an electrical outlet.
This step is paramount to prevent accidental starts and ensure your safety during the sharpening process.
Secure the Blade: To sharpen the blade effectively and safely, it’s essential to secure it in place. Use a vise or clamps to immobilize the blade, preventing any unwanted movement during sharpening. A securely held blade will not only make the process smoother but also minimize the risk of accidents.
Identifying Cutting Teeth
Before you begin sharpening, you need to identify the cutting teeth on the pole saw blade. These teeth are distinct from the rakers or depth gauges and have a different shape, typically featuring a pointed or hooked design. Knowing which teeth to sharpen is essential for the overall performance of the blade.
Determining the Correct Sharpening Angle
The correct sharpening angle varies from one blade to another and is often provided by the manufacturer in the user manual. Typically, you should aim for an angle between 30-45 degrees when sharpening.
However, if you’re uncertain about the correct angle, consult the manufacturer’s recommendations or use an angle guide to ensure your blade is sharpened to its ideal cutting edge.
Sharpening Technique
Working on One Tooth at a Time: Precision is key in sharpening a pole saw blade. Work on one tooth at a time, starting from the base of the tooth and filing towards the tip. Maintain a consistent angle and apply even pressure while sharpening each tooth. This process ensures that every tooth is sharpened uniformly, resulting in a balanced blade.
Smooth and Consistent Motion: When filing the teeth, use a smooth and consistent filing motion. Avoid applying excessive pressure, as it can lead to uneven sharpening.
In addition, the goal is to create a sharp edge on each tooth without altering the blade’s overall shape or symmetry.
Maintaining Consistency
To keep track of your progress and ensure that you sharpen each tooth equally, consider marking the teeth as you complete them. A simple marker or paint can be used to identify which teeth have already been sharpened, preventing you from accidentally revisiting them and maintaining consistency across the blade.
Raker Adjustment
Occasionally, you may need to adjust the rakers or depth gauges to ensure the proper depth of the cut. These adjustments are essential for the overall performance of the blade, as they determine how deeply the blade bites into the wood. Make sure to consult your user manual or manufacturer recommendations for this process.
Cleaning the Blade
After sharpening, it’s important to clean the blade thoroughly. This ensures that any metal shavings, debris, or residue are removed. You can use a brush or compressed air to clean the blade effectively. A clean blade not only cuts more efficiently but also lasts longer.
Checking Sharpness
Once the sharpening is complete, it’s good practice to test the blade’s sharpness by making a few test cuts on a suitable branch or material. If the blade still doesn’t cut well, you may need to revisit the sharpening process to further enhance its sharpness.
Reassembling and Testing
After ensuring that your blade is sharp and functioning properly, reassemble your pole saw, and perform some test cuts to ensure that it’s cutting efficiently and safely. This step allows you to confirm that your sharpening efforts have been successful and that the saw is ready for use.
Final Words
In conclusion, when sharpening a pole saw blade, safety, and precision are paramount. Start by ensuring the power source is disconnected and securely clamping the blade. Identify the cutting teeth and adhere to the manufacturer’s recommended sharpening angle.
Furthermore, the key to success lies in working on one tooth at a time, using a smooth and consistent filing motion. Marking the teeth as you go along helps maintain uniform sharpness. Clean the blade diligently to remove debris and test its sharpness with a few trial cuts.
Lastly, reassemble your pole saw and conduct tests to confirm it’s operating safely and efficiently. By following these steps, your pole saw will be ready for the next pruning or cutting task.