Changing the blade on a miter saw is a relatively straightforward process, but it’s essential to follow safety precautions and use the correct tools. Here’s a quick guide on how to change a miter saw blade
- Unplug the miter saw.
- Raise the blade guard.
- Loosen the blade nut counterclockwise.
- Remove the nut and blade.
- Install the new blade, replicating the old blade’s orientation.
- Tighten the blade nut, ensuring it’s snug but not over-tightened.
- Lower the blade guard.
- Plug in the miter saw.
- Test the blade before use.
How to Remove the Old Blade?
Before you can install a new blade on your miter saw, you need to master the art of safely removing the old one.
How to lock the blade in place
Most miter saws have a blade lock to hold the blade in place while you work. This is typically a button or lever near the blade guard or handle.
With the miter saw turned off and unplugged, press or engage the blade lock to immobilize the blade. It prevents the blade from spinning during the removal process.
Using the blade wrench:
The blade nut is at the center of the blade, holding it in place. It’s often a hexagonal shape and requires a specialized blade wrench for removal.
Furthermore, insert the blade wrench into the blade nut, making sure it fits securely. Follow the manufacturer’s instructions for proper placement.
Removing the blade nut
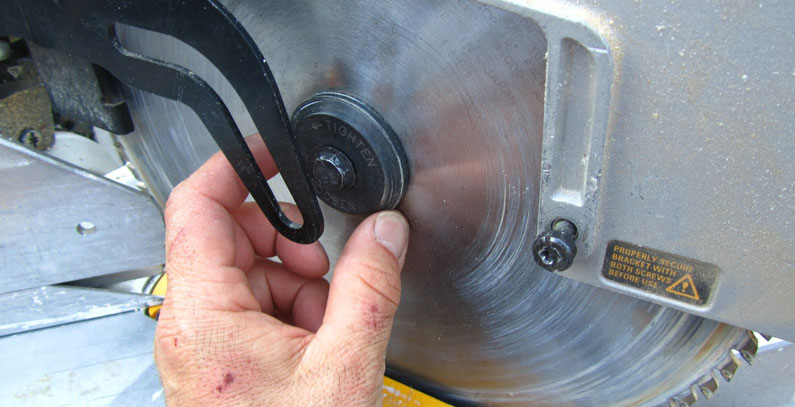
Using the blade wrench, turn the blade nut counterclockwise (lefty loosey) to loosen it. Be cautious, as this nut may be tightly secured.
While turning the nut, hold the blade in place with your other hand to prevent it from spinning. This step ensures safe removal without the blade moving unexpectedly.
Taking out the old blade
Once the nut is sufficiently loosened, carefully slide the old blade off the arbor (the central shaft). Be mindful of any washers or spacers between the blade and the saw. Note their positions for reassembly.
In addition, take a moment to inspect the old blade for any damage or wear. It’s a good practice to replace a blade if it’s dull or damaged to maintain clean and safe cuts.
How to Select a New Blade?
Choosing the right blade for your miter saw involves considering factors like material, tooth count, and blade diameter to ensure precision and efficiency in your cutting tasks.
Types of miter saw blades and their uses
Crosscut Blades: These blades have a high tooth count and are ideal for making smooth, precise crosscuts on wood and other materials.
Rip Blades: With fewer teeth and a more aggressive tooth geometry, rip blades are designed for quickly cutting along the grain of wood.
Combination Blades: These blades are versatile and can handle a range of tasks, making them suitable for most general woodworking projects.
Finishing Blades: They have a high tooth count and are excellent for creating fine, polished cuts on wood, often used for trim work.
What Are the Best Ways to Install the New Blade?
Installing a new blade on your miter saw can be a breeze with these step-by-step instructions, ensuring a safer and more accurate cutting experience.
Checking the blade’s orientation
New blades often have markings indicating the correct rotation direction. This is crucial for proper cutting performance and safety.
In most cases, the teeth should point forward toward the front of the saw, ensuring they cut into the material correctly.
Using the blade wrench to secure the new blade
Carefully slide the new blade onto the arbor, making sure it fits snugly against any washers or spacers you noted during the removal of the old blade.
With the blade in place, use the blade wrench to hold it steady and prevent it from moving while you tighten the nut.
Tightening the blade nut
Use the blade wrench to turn the blade nut clockwise (righty tight) to secure the blade in place.
Refer to the manufacturer’s recommendations for the appropriate torque level for the blade nut. Over-tightening can damage the blade or the saw, so ensure it’s securely tightened without excessive force.
Ensuring proper blade tension
Some miter saws allow for blade tension adjustment. Consult your saw’s manual for instructions on adjusting blade tension if necessary.
After installation, gently tap the blade with a soft object (like a wooden dowel). It should produce a clear, musical tone. If it sounds dull or thuds, it may indicate improper tension.
Final Words
In conclusion, changing a miter saw blade is a straightforward task that requires careful attention to safety and precision.
It involves unplugging the saw, raising the blade guard, removing the old blade, and installing the new one while ensuring proper alignment. Remember to follow safety precautions, wear protective gear, and consult your saw’s user manual for specific instructions.
By following these steps, you can maintain the functionality and safety of your miter saw for future woodworking projects, making the blade replacement process a routine and manageable task in your workshop.